Key Takeaway
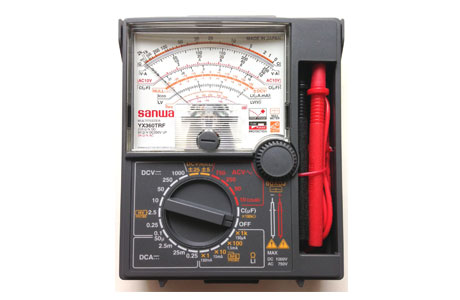
To test a capacitor with a multimeter, first set it to the capacitance (F) function if available. Connect the probes to the capacitor terminals, ensuring correct polarity for electrolytic capacitors.
The multimeter will display the capacitance value, which should match the capacitor’s rated value. If the reading is too low or shows no value, the capacitor may be faulty and need replacement.
What is a Capacitor, and Why Test It?
A capacitor is an essential electronic component that stores and releases electrical energy in a circuit. It consists of two conductive plates separated by an insulating material, known as a dielectric. Capacitors are commonly used in circuits to smooth voltage fluctuations, store energy temporarily, and filter signals.
Over time, capacitors can degrade, leading to circuit malfunctions. For instance, in power supplies, a failing capacitor can cause inconsistent voltage, affecting the performance of connected devices. Testing a capacitor with a multimeter helps identify whether it is functioning correctly.
To test a capacitor, set the multimeter to capacitance mode. Connect the test leads to the capacitor terminals, ensuring it is discharged beforehand. The reading should match the capacitor’s rated value; significant deviations indicate a fault. Testing capacitors is especially crucial in repairing electronics like televisions, computers, or audio systems.
Understanding what a capacitor does and why testing it is necessary enables engineers to maintain circuit reliability and avoid unexpected failures in electronic systems. It’s a small but vital step in ensuring smooth operation across various applications.
Preparing Your Multimeter for Capacitor Testing
Proper preparation ensures accurate capacitor testing. Here’s how to get your multimeter ready:
Inspect the Multimeter: Ensure your multimeter is in good working condition. Check the probes for damage, and confirm that the device supports capacitance testing (often marked as a “Cap” or capacitor symbol).
Power Off the Circuit: Disconnect the capacitor from the power source and the circuit. This step is critical to avoid incorrect readings or potential hazards.
Discharge the Capacitor: Use a resistor or insulated tool to safely discharge the capacitor. A charged capacitor can deliver a dangerous shock or damage the multimeter.
Set the Multimeter: Turn the dial to the capacitance testing mode. If your multimeter does not have this mode, you can still perform a basic resistance or leakage test using the ohmmeter function.
Connect the Probes: Attach the red probe to the positive terminal and the black probe to the negative terminal of the capacitor. Make sure the connections are firm for reliable results.
By following these steps, you can prepare your multimeter and capacitor for an accurate and safe testing process. Proper preparation also reduces the chances of damaging the capacitor or your multimeter.
How to Test a Capacitor’s Health (Capacitance and Leakage)
Testing a capacitor’s health involves two key checks: capacitance and leakage. Here’s how to perform each:
Capacitance Testing:
Set your multimeter to the capacitance mode.
Connect the probes to the capacitor terminals as explained earlier.
Read the displayed capacitance value on the multimeter. Compare it to the capacitor’s rated capacitance (printed on its body). If the reading is significantly lower or shows no value, the capacitor may be faulty.
Leakage Testing:
Set the multimeter to resistance mode.
Attach the probes to the capacitor terminals and observe the reading. A good capacitor will show a rising resistance value, eventually displaying “OL” (open loop) or infinite resistance.
If the resistance remains low or doesn’t increase, the capacitor is likely leaking current and needs replacement.
Performing both tests gives a comprehensive view of the capacitor’s health. While capacitance testing ensures the capacitor can store charge properly, leakage testing identifies unwanted current flow, which can compromise circuit performance.
Signs of a Faulty Capacitor During Testing
Capacitors play a vital role in electronic circuits by storing and releasing electrical energy. However, over time, capacitors can fail due to wear, temperature fluctuations, or electrical stress. A faulty capacitor may exhibit several signs during testing with a multimeter. First, when measuring the capacitance, a failing capacitor will often display a significantly lower capacitance value than its rated capacity. This drop in capacitance can lead to malfunctioning circuits, as capacitors that cannot hold enough charge will fail to smooth power fluctuations or filter signals as intended.
In addition to decreased capacitance, a faulty capacitor may also show a short circuit or an open circuit when measured for continuity. A short-circuited capacitor will exhibit low resistance, while an open capacitor will display no continuity at all. Furthermore, in some cases, a damaged capacitor may show signs of physical damage, such as bulging or leaking, which often occurs when the dielectric material inside the capacitor breaks down due to excessive voltage or heat. These physical signs are particularly common in electrolytic capacitors.
If you suspect a capacitor is faulty, it’s essential to test it with a multimeter and check for both capacitance and continuity. Replacing a faulty capacitor is often an effective way to restore the proper functioning of the circuit, ensuring reliable performance and preventing further damage to surrounding components.
Using Multimeter Features for Advanced Capacitor Analysis
Multimeters are commonly used for testing capacitors, which are crucial components in many electrical circuits. Advanced multimeters come with dedicated capacitor testing modes that allow for precise measurement of capacitance, which is essential for ensuring that capacitors are operating within their specified parameters.
When testing capacitors, a key challenge is determining whether the capacitor has failed. Multimeters with the ability to measure capacitance provide an accurate reading of a capacitor’s value, and if the reading is significantly different from the capacitor’s rated value, it may indicate a fault. Some multimeters also have the ability to test for leakage, which is a common failure mode in capacitors. Advanced multimeters can apply a test signal to the capacitor and measure any voltage drop, indicating leakage. Additionally, measuring the ESR (Equivalent Series Resistance) of a capacitor is important, as high ESR values may signal that the capacitor is no longer functioning correctly.
Conclusion
Testing a capacitor involves setting the multimeter to capacitance mode, connecting the probes to the capacitor terminals, and observing the displayed reading. A healthy capacitor will show a value close to its rated capacitance, while a faulty one may show infinite resistance or a significantly different capacitance value.
Capacitor testing helps in identifying issues in electronic circuits and ensures that the components function correctly. Regular testing with a multimeter can save time and prevent costly repairs by catching issues early.