Key Takeaway
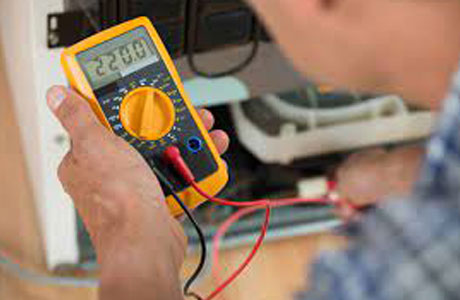
To measure frequency, set the multimeter to the frequency (Hz) setting. Connect the probes to the circuit or signal source. The multimeter will display the frequency in hertz.
Ensure you’re testing a signal or circuit that generates a frequency, such as an oscillator or AC voltage. The reading shows how often the signal cycles per second.
Understanding Frequency and Its Importance
Frequency, measured in hertz (Hz), refers to the number of cycles an alternating current (AC) completes in one second. It is a critical parameter in both electrical and electronic systems, determining the behavior of AC signals.
In residential power systems, standard frequencies are 50Hz or 60Hz, depending on the country. Devices like transformers and motors are designed to operate optimally at these frequencies. In electronics, frequency is crucial in applications like signal processing, where it defines the operation of filters, oscillators, and communication devices.
Using a multimeter to measure frequency helps diagnose issues like abnormal power supply fluctuations or faulty equipment operation. For example, incorrect frequency levels in industrial machines can lead to inefficiencies or damage. Understanding frequency is essential for maintaining the reliability of AC-powered systems, making it a vital concept for engineers and technicians.
Setting Up Your Multimeter for Frequency Measurement
To measure frequency accurately, you must first prepare your multimeter. Here’s how:
Inspect the Multimeter: Ensure your device is in working order. Check for clean probes, functional buttons, and sufficient battery power.
Select the Frequency Mode: Switch the dial to the frequency measurement setting, often labeled as “Hz.” If your multimeter lacks this mode, it might not support frequency testing.
Check the Probes: Ensure the probes are securely connected to the multimeter’s input ports. Use standard probes for most applications or specialized ones for high-frequency signals.
Set the Measurement Range: Some multimeters allow you to set a manual range for frequency. If unsure of the signal’s range, start with the highest setting and adjust downward.
Test on a Known Signal: Before working on your target circuit, test the multimeter on a known frequency source to confirm it’s functioning correctly.
Proper setup is essential for obtaining accurate and reliable frequency readings. Skipping any of these steps could result in errors or inconsistent results.
Step-by-Step Guide to Measure Hertz Accurately
Once your multimeter is ready, follow these steps to measure frequency accurately:
Power Off the Circuit (If Necessary): For some devices, it’s safer to connect probes while the system is powered off. For live circuits, proceed with caution.
Connect the Probes: Attach the multimeter probes to the circuit points where you need to measure frequency. For AC signals, connect the probes across the source or component.
Turn On the Circuit: If the circuit was powered off, turn it on after connecting the probes. Ensure there’s no excessive noise or interference.
Read the Frequency: The multimeter will display the frequency in hertz (Hz) on its screen. For signals with varying frequencies, observe the range of fluctuation.
Verify the Measurement: Cross-check your reading with the expected frequency range. If the measurement is outside the range, recheck your setup or test another point in the circuit.
This process ensures you capture the most accurate frequency readings possible, helping you troubleshoot and optimize the circuit effectively.
Applications of Frequency Measurements in Electronics
Frequency measurements are essential for diagnosing and analyzing the performance of various electronic components and systems. Multimeters equipped with frequency measurement capabilities allow users to measure the frequency of oscillating signals, such as those in audio devices, radio transmitters, and digital circuits. This is particularly useful in applications like signal processing, audio testing, and troubleshooting communication systems, where accurate frequency readings are essential for maintaining proper operation.
In electronic circuits, frequency is a critical parameter, especially for components like oscillators, clocks, and radiofrequency (RF) circuits. For instance, frequency measurements are necessary to verify that oscillators in clock circuits are functioning within the correct range. If the frequency is off, it could lead to synchronization issues or malfunctioning devices. Similarly, in RF applications, frequency measurements are crucial for testing the performance of transmitters, receivers, and filters.
Multimeters that include frequency measurement capabilities offer a valuable tool for engineers and technicians working with electronic devices. These measurements can help ensure that signals are within acceptable ranges, which is vital for optimal performance. Additionally, frequency measurements can assist in diagnosing faults, such as drift or interference in oscillators and signal generators, helping to maintain the integrity of electronic systems.
Common Mistakes to Avoid During Frequency Testing
Frequency testing, particularly in AC circuits, is crucial for ensuring that systems are running within the correct operational frequency. One of the most common mistakes is not understanding the settings of the multimeter. Some models require the user to switch modes specifically for frequency measurements, so using the wrong mode may result in inaccurate readings. Always ensure that the multimeter is set to the frequency mode before testing, and refer to the manual for specific instructions on using the frequency function.
Another mistake is not properly connecting the probes to the correct points in the circuit. When testing the frequency of a signal, probes should be placed where the frequency signal is most relevant, often at the signal source or near the point of interest. Avoid placing the probes on areas that are disconnected or not part of the actual signal path. Additionally, be aware of the multimeter’s range. Some lower-end models may have a limited frequency range and may not accurately measure higher frequency signals.
Conclusion
In conclusion,To measure frequency, set the multimeter to frequency (Hz) mode, connect the probes to the circuit, and observe the reading. This feature is particularly useful in analyzing AC power supplies, audio systems, and oscillators.
Frequency measurements help ensure that devices are operating at the correct frequencies, which is critical for performance and efficiency. Modern multimeters make this process straightforward, even for beginners.