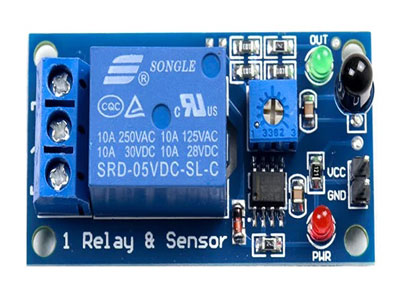
Key Takeaway
To connect a sensor to a relay, follow these steps:
Connect Sensor Output to Relay Input: Wire the sensor’s output to the input terminal of the relay.
Ground Connection: Ensure the sensor’s ground is connected to the relay’s ground terminal.
Power Supply: Connect the sensor’s Vcc (positive power supply) to the relay’s Vcc terminal.
Test the Connection: Activate the sensor and check if the relay switches as expected.
This setup allows the sensor to control the relay, enabling automated switching based on sensor readings.
Choosing the Right Sensor and Relay
Selecting the appropriate sensor and relay is the first crucial step. Sensors come in various types, such as proximity, photoelectric, and temperature sensors, each suited for different applications. Understand the operational environment and the specific needs of your application to choose the right sensor. For instance, a proximity sensor is ideal for detecting objects without physical contact.
Relays, on the other hand, act as switches to control high-power devices using low-power signals from sensors. Choose a relay based on the voltage and current requirements of your load. Ensure the relay can handle the sensor’s output signal and the power requirements of the connected load. A mismatch here can lead to failures or even damage to your equipment.
Wiring Basics
Understanding wiring basics is crucial before starting the actual connection process. In industrial settings, sensors typically have three wires: power, ground, and signal. Relays also feature similar connections, with coil terminals for the control signal and switch terminals for the load.
For sensors, begin by connecting the power wire to a suitable voltage source, often 24V DC in industrial applications. The ground wire should be connected to the common ground of your system. The signal wire, which carries the sensor’s output, should be connected to the relay’s coil terminal to control its operation.
Proper wiring practices are essential. Use the correct wire gauges to handle the electrical load and ensure all connections are secure to avoid loose or short circuits. Loose connections can lead to intermittent faults, which are difficult to diagnose and can cause downtime.
It’s vital to follow these practices to maintain system reliability. Regular checks and maintenance of wiring can prevent unexpected issues. Remember, clear and precise wiring not only ensures safety but also enhances the longevity and efficiency of your industrial systems.
Step-by-Step Connection Guide
Prepare Your Tools and Materials
Before starting, gather all necessary tools and materials. You’ll need the sensor, relay, power supply, wires, and essential tools like screwdrivers, wire strippers, and multimeters. Having everything ready ensures a smooth process.
Connect the Sensor Power and Ground
First, connect the sensor’s power wire to the positive terminal of the power supply. Ensure the ground wire is attached to the common ground. This step is crucial for providing the sensor with the correct voltage and establishing a reliable ground connection.
Connect the Sensor Signal to the Relay
Next, link the sensor’s signal wire to the relay’s coil terminal. This connection allows the sensor to control the relay, enabling the automation of your device. Make sure the connection is secure to avoid any signal loss.
Connect the Relay to the Load
Attach the relay’s switch terminals to the device you wish to control. Ensure the relay’s specifications match the load requirements to prevent any potential damage or malfunction. This step is critical for proper device operation.
Power On and Test
Double-check all connections before powering on the system. Activate the sensor and observe if the relay switches as expected. This final step verifies that your setup works correctly and safely.
Expert Explanation
Prepare Your Tools and Materials
For a seamless setup, begin by assembling all required components. This includes the sensor, relay, power supply, and necessary tools like screwdrivers, wire strippers, and multimeters. A well-prepared workspace minimizes errors and interruptions.
Connect the Sensor Power and Ground
Connecting the sensor’s power and ground is a straightforward yet vital step. Attach the power wire to the positive terminal and the ground wire to the common ground. Ensuring a solid ground connection is essential for sensor stability and performance.
Connect the Sensor Signal to the Relay
The next step involves connecting the sensor’s signal wire to the relay’s coil terminal. This connection allows the sensor to send signals to the relay, controlling its operation. It’s crucial to secure this connection to ensure consistent signal transmission.
Connect the Relay to the Load
Connecting the relay to the load involves attaching the relay’s switch terminals to the device you intend to control. Verify that the relay’s specifications are compatible with the load to avoid any issues. This ensures the relay can handle the device’s requirements.
Power On and Test
Before powering on the system, double-check all connections for accuracy and security. Once powered, activate the sensor and observe the relay’s response. This testing phase confirms that your setup functions correctly and safely, completing the installation process successfully.
Testing the Connection
After completing the wiring, it’s crucial to test the connection to ensure everything works as intended. Begin by powering up the system and observing the sensor’s operation. When the sensor detects the target, it should send a signal to the relay, causing it to activate and control the connected load.
Use a multimeter to verify the voltage levels at different points in the circuit. First, check the relay’s coil to ensure it receives the correct signal from the sensor. Next, test the load side of the relay to confirm it’s properly switching the connected device on and off. Conduct multiple tests to ensure reliability under different conditions. This ensures the system’s integrity and helps identify any potential issues early on.
As an industrial expert, I always emphasize the importance of thorough testing to newly joined engineers. It’s not just about making the connections but ensuring they work flawlessly. Remember, testing isn’t a one-time task. Regular testing and maintenance are key to a reliable and efficient system. By following these steps, you can ensure that your connections are solid and your system operates as expected, providing consistent performance in your industrial applications.
Common Issues and Fixes
Even with a meticulous setup, issues can arise in industrial automation relays. Common problems include the sensor signal not reaching the relay, the relay not activating, or the load not responding. Understanding these issues and knowing how to fix them is crucial for newly joined engineers in the industry.
Sensor Signal Issues
If the relay isn’t receiving the sensor signal, the first step is to check the wiring connections. Loose wires or short circuits can prevent the signal from reaching the relay. Ensure all connections are secure and intact. Additionally, verify that the sensor’s output voltage matches the relay’s input requirements. Mismatched voltages can cause signal transmission failures, hindering the relay’s operation.
Relay Activation Issues
When the relay doesn’t activate, it’s essential to confirm that it’s receiving the correct voltage. Inspect the power supply and ensure that the voltage is within the specified range for the relay. Examine the coil terminals for any signs of damage or loose connections. A damaged coil or poor connection can prevent the relay from activating, disrupting the entire system’s functionality.
Load Response Issues
If the load doesn’t respond, the problem might lie in the relay’s switch terminals. Make sure the switch terminals are properly connected to the load. Double-check the load’s power requirements and confirm that the relay can handle the load’s capacity. An overloaded relay can fail to operate correctly, leading to unresponsive loads. By ensuring proper connections and matching power requirements, you can resolve load response issues effectively.
Conclusion
Connecting a sensor to a relay is a foundational skill in industrial automation. By following this guide, you can ensure a reliable and efficient setup. Remember to choose the right components, understand the wiring basics, and carefully follow the connection steps. Regular testing and troubleshooting can prevent common issues and ensure smooth operations. With these skills, you’ll enhance the reliability and efficiency of your industrial applications, contributing to seamless automation processes.