Key Takeaway
To connect a PLC to a servo drive, begin by wiring the servo drive’s control input to the PLC’s output module. Ensure that the connections are secure and that the voltage levels are compatible. Next, program the PLC to send Pulse Width Modulation (PWM) signals to the servo drive. These PWM signals are essential for controlling the servo motor’s position, speed, and torque.
The width of the pulses in the PWM signal directly determines the servo motor’s behavior. By adjusting the pulse width in the PLC program, you can control the motor’s position with high precision. After setting up the wiring and programming, test the connection by running the PLC program and observing the servo motor’s response to confirm that everything is functioning correctly.
Understanding PLC-Servo Drive Communication Protocols
The first step in connecting a PLC to a servo drive is to understand the communication protocols that both devices use. Common protocols include EtherCAT, Modbus, Profibus, and CANopen. These protocols define how the PLC sends commands to the servo drive and how the drive communicates its status back to the PLC. Choosing the right protocol depends on the specific requirements of your system, such as the speed of communication, the complexity of the control signals, and the compatibility with existing equipment. Understanding these protocols is crucial for setting up a reliable and efficient control system.
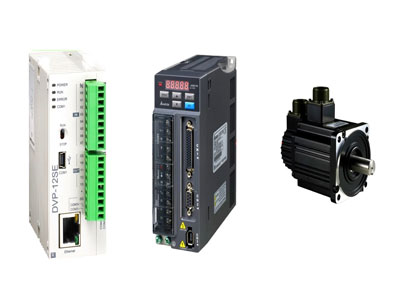
Step-by-Step Guide to Wiring the PLC and Servo Drive
Wiring the PLC to the servo drive is a crucial step that ensures effective communication and control between the two devices. Start by identifying the control signal wires on the PLC, which will typically include inputs for positioning, speed control, and operational commands. These wires need to be connected to the corresponding input terminals on the servo drive. It’s essential to match the wiring to the communication protocol you’ve selected, such as EtherCAT or Modbus, ensuring that signal integrity is maintained.
Next, establish the power connections. Connect the power supply to both the PLC and the servo drive, ensuring that the voltage and current ratings are within the specified limits. Incorrect power supply connections can lead to operational failures or even damage the equipment. After securing all connections, double-check each one for accuracy and stability to avoid issues such as short circuits or interference. Proper wiring is not just a technical requirement; it’s the foundation for reliable, long-term performance of the entire control system.
Configuring the PLC for Servo Drive Control
Once the physical connections are established, the next step is to configure the PLC to control the servo drive. This process begins with programming the PLC, which involves writing the control logic that dictates how the servo motor will respond to various inputs. The program should define key parameters such as speed, acceleration, and deceleration profiles, which will be used to control the motor’s movements. Many PLCs offer pre-built function blocks or libraries that simplify this process, especially for common tasks like positioning or torque control.
Beyond the basic control logic, configuring the PLC also involves setting up the communication parameters to ensure that the PLC and servo drive can exchange data effectively. This might include adjusting baud rates, setting up error-checking protocols, or configuring data frames, depending on the complexity of the application. Proper configuration is crucial for ensuring that the servo drive responds accurately and promptly to the PLC’s commands. To finalize the setup, it’s important to test the configuration with simple commands to verify that the servo motor behaves as expected. This testing phase helps identify and resolve any issues before the system is fully operational, ensuring smooth and precise motor control.
Testing and Verifying the Connection
Before fully deploying the system, testing and verifying the connection between the PLC and servo drive is essential to ensure seamless operation. Begin by sending basic commands from the PLC to the servo drive to check if the motor responds as expected. Start with simple position commands—such as moving the motor to a specific angle or position—and observe the movement closely. This helps confirm that the servo drive is receiving and interpreting the commands correctly. Additionally, monitor the feedback from the servo drive to the PLC. This feedback loop is crucial for real-time adjustments, ensuring that the motor’s actions match the intended commands. Any discrepancies in feedback during this phase could indicate underlying issues that need addressing before the system is put into full operation.
During this testing phase, it’s important to test the system under various conditions to simulate real-world operations. Gradually increase the complexity of the commands, introducing different speeds, positions, and torque settings, to observe how the system handles more demanding tasks. This thorough testing process helps identify any potential problems early, allowing for adjustments and refinements that will lead to a more reliable and efficient operation. By carefully verifying every aspect of the connection, you ensure that the system is ready for smooth, uninterrupted performance in the field.
Troubleshooting Common Connection Issues
Despite careful setup and testing, connection issues between a PLC and a servo drive can still occur, and troubleshooting these problems is a critical skill. One of the most common issues is communication errors, where the PLC and servo drive fail to exchange data correctly. This can often be traced back to incorrect communication settings, such as mismatched baud rates or protocol errors. Ensuring that both devices are configured to the same communication standards is key to resolving this problem. Another frequent issue is incorrect wiring—loose or incorrectly connected wires can lead to erratic motor behavior or complete failure to respond. Double-checking all connections and ensuring they match the wiring diagrams provided by the manufacturers can quickly resolve these issues.
Additionally, improper configuration of the PLC or servo drive can lead to unexpected behavior. For example, if the servo drive is not properly tuned to the motor’s specifications, it might result in sluggish performance or inaccurate positioning. Reviewing the configuration settings and comparing them against the motor’s requirements is an effective way to diagnose and correct these problems. In some cases, consulting the documentation for both the PLC and servo drive can provide valuable insights, as they often include specific troubleshooting steps for common issues. By methodically addressing these potential problems, you can ensure that the system operates smoothly and efficiently, minimizing downtime and maximizing productivity.
Conclusion
Successfully connecting a PLC to a servo drive requires a thorough understanding of communication protocols, careful wiring, precise configuration, and diligent testing. By following these steps, you can achieve seamless integration, allowing for precise control over your machinery and processes. This not only enhances the efficiency of your operations but also extends the lifespan of your equipment by ensuring that all components work harmoniously together. With careful planning and execution, you can overcome common challenges and create a robust and reliable control system that meets the demands of modern industrial automation.