Key Takeaway
To connect an IR sensor to a relay, follow these steps:
Identify Terminals: Locate the output terminals on the IR sensor and the input terminals on the relay.
Power Connections: Connect the power supply to both the IR sensor and the relay. Ensure the IR sensor’s Vcc connects to the relay’s Vcc and their grounds are linked.
Sensor to Relay Connection: Link the output of the IR sensor to the input of the relay coil.
Test the Setup: Activate the IR sensor and check if the relay switches as expected.
This setup allows the IR sensor to control the relay, enabling automated switching based on infrared detection.
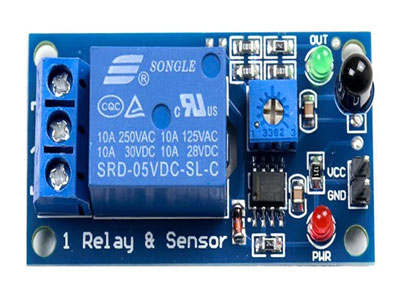
Understanding IR Sensors and Relays
Infrared (IR) sensors and relays are fundamental components in industrial automation. IR sensors detect objects and measure distance by emitting infrared light, which reflects off surfaces and returns to the sensor. The sensor calculates the distance based on the time it takes for the light to return. Relays, on the other hand, act as switches that control high-power devices using low-power signals. Understanding the basic functionality of these components is crucial. IR sensors are often used for object detection, while relays are employed to control larger electrical loads, such as motors or lighting systems.
In an industrial setting, integrating these two components can automate processes efficiently. For instance, an IR sensor can detect an object on a conveyor belt and signal a relay to activate a sorting mechanism. This seamless interaction between sensors and relays enhances automation, reduces human intervention, and improves operational efficiency.
Required Components and Tools
To connect an IR sensor to a relay, you’ll need the following:
IR Sensor: Choose an IR sensor suitable for your application.
Relay Module: A relay module compatible with your IR sensor.
Power Supply: Ensure the power supply meets the voltage and current requirements of both the IR sensor and relay.
Connecting Wires: Sufficient length and appropriate gauge.
Breadboard or PCB: For organizing and securing the components.
Multimeter: For testing and troubleshooting connections.
Screwdriver and Wire Stripper: Basic tools for connecting wires and components.
Having the right tools and components is essential for a smooth setup. Double-checking compatibility between the IR sensor and relay module can prevent potential issues. Proper preparation ensures a seamless connection, making the process straightforward and efficient.
You May Like to Read
Step-by-Step Wiring Instructions
Connecting an IR sensor to a relay involves several critical steps to ensure proper functionality and safety. Here’s a detailed guide:
Power Connection
First, connect the power supply to both the IR sensor and the relay module. Ensure the voltage matches the specifications for both devices. Using the correct voltage is crucial; too high or too low can damage the components. Typically, IR sensors and relay modules operate at 5V or 12V, so check the datasheets.
Signal Connection
Next, connect the output pin of the IR sensor to the input pin of the relay module. This connection allows the IR sensor to control the relay based on the detection of infrared signals. Ensure the connection is secure and correctly oriented.
Relay Output
Then, connect the relay’s output terminals to the load, such as a motor or a light. This connection enables the relay to control the power to the load. Ensure the connections are properly insulated and secure to prevent short circuits or electrical hazards.
Ground Connection
Finally, connect the ground terminals of the IR sensor, relay module, and power supply together. A common ground is essential for the system to function correctly and ensures all components share a reference point.
Key Tips
Pay attention to the polarity of the power connections.
Double-check the pin configuration of the IR sensor and relay.
Ensure all connections are secure and insulated.
Following these steps ensures a reliable and safe connection. Proper wiring is crucial for the system to work as intended, preventing malfunctions and ensuring long-term reliability.
Testing and Calibration
Once the wiring is complete, testing and calibration are crucial to ensure the IR sensor and relay system work correctly. Start by powering up the system and carefully observing the IR sensor’s behavior. Using a multimeter, check the voltage at various points in the circuit to ensure proper power flow and connectivity.
Sensor Testing: Place an object in front of the IR sensor. Observe the relay’s response; it should activate when the sensor detects the object. This step verifies that the sensor and relay are communicating effectively.
Calibration: Adjust the sensitivity of the IR sensor if needed. Many sensors have a potentiometer to fine-tune the detection range. This adjustment is essential to ensure the sensor operates within the desired parameters, enhancing its accuracy.
Testing and calibration ensure the sensor and relay function harmoniously, crucial for reliability in industrial applications. Fine-tuning the system improves its performance, making it more dependable for various tasks.
By following these steps, you can ensure your IR sensor system is both accurate and reliable, ready for any industrial application. This meticulous approach guarantees that your system will perform optimally, providing precise and dependable results.
Troubleshooting Common Problems
No Response from Relay: If the relay is not responding, start by checking the power connections. Ensure that the infrared (IR) sensor is receiving power and functioning correctly. It’s essential to verify the signal connection between the sensor and the relay. A break in the connection can cause the relay to fail to activate.
Erratic Behavior: Erratic behavior in relays can often be attributed to electrical noise. This noise can interfere with the sensor’s signal. To mitigate this issue, make sure the system is properly grounded. Using shielded cables can also help reduce electrical noise, ensuring more stable relay operation.
Incorrect Relay Activation: If the relay activates incorrectly, it might be due to the IR sensor’s calibration. Ensure the sensor is calibrated to activate the relay only when intended. Double-check the sensor’s detection range and adjust it if necessary to prevent false activations.
Troubleshooting involves systematic checking of all connections and components. Understanding these common issues can help quickly identify and resolve problems, ensuring smooth operation. For a newly joined engineer, recognizing these symptoms and knowing the steps to correct them is crucial for maintaining system efficiency and reliability.
Conclusion
Integrating IR sensors with relays in industrial applications offers significant advantages. This setup automates processes, enhances efficiency, and reduces human intervention. By understanding the components, following proper wiring instructions, and performing thorough testing and calibration, you can create a reliable and efficient system. Troubleshooting common problems ensures long-term functionality and reliability.