Key Takeaway
To connect a 4-20mA sensor to a PLC, start by powering the sensor. Connect the positive lead of the sensor to a suitable power source, ensuring the voltage matches the sensor’s specifications. Next, connect the sensor’s negative lead (common) to the analog input terminal on the PLC. Double-check all connections to ensure they are secure and correctly placed. Then, configure the PLC to read the analog input by setting up the input channel in the PLC software to interpret the 4-20mA signal accurately. Finally, power up the system and test the sensor’s readings on the PLC to ensure accurate data transmission. This process ensures your sensor is properly integrated with your PLC.
Overview of 4-20mA Sensors
4-20mA sensors are the backbone of industrial automation. These sensors measure physical parameters like temperature, pressure, and flow rate, converting them into a standardized current signal. The 4-20mA current loop is favored because it is less susceptible to signal loss over long distances, making it reliable for industrial environments. Whether you are dealing with harsh conditions or long cable runs, 4-20mA sensors deliver consistent, accurate data.
This standardized signal also simplifies integration with various control systems. With 4mA representing the lower limit and 20mA the upper, troubleshooting and diagnostics become straightforward. A zero current often indicates a wiring issue or sensor failure, providing a clear diagnostic signal. This simplicity and reliability make 4-20mA sensors indispensable in industrial automation.
Importance of 4-20mA in Industrial Automation
In industrial automation, precision and reliability are essential. The 4-20mA signal stands out due to its robustness. Unlike voltage signals, 4-20mA current signals resist electrical noise, which is crucial in environments with heavy machinery and electromagnetic interference. This ensures the data received by your PLC (Programmable Logic Controller) is accurate, leading to better control and monitoring of processes.
The 4-20mA standard is widely adopted, allowing components from different manufacturers to work together seamlessly. This interoperability is vital in large-scale automation projects where mixing and matching components is often necessary. Integrating these sensors into existing systems without compatibility issues saves both time and money, enhancing overall efficiency.
Imagine you are in a busy factory with machines whirring and motors buzzing. In such a setting, you need a signal that cuts through the noise. That’s where 4-20mA comes in, providing a reliable and accurate data transmission method. It’s like having a clear conversation in a noisy room.
Furthermore, the 4-20mA signal has a built-in fail-safe feature. If the loop is broken, the signal drops to 0mA, immediately alerting you to an issue. This makes troubleshooting easier and ensures safety in operations.
In summary, the 4-20mA signal’s noise resistance, wide adoption, and fail-safe features make it a cornerstone of industrial automation, ensuring precise and reliable data for better process control.
You May Like to Read
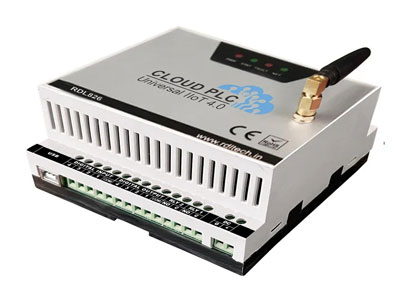
Steps to Connect 4-20mA Sensor to PLC
Connecting a 4-20mA sensor to a PLC is essential for accurate data collection in industrial settings. Start by identifying the sensor’s output terminals, typically labeled as positive (+) and negative (-). Connect the positive terminal of the sensor to the positive input of the PLC’s analog input module. Likewise, connect the negative terminal to the negative input of the PLC. Secure connections are crucial to prevent signal loss.
Next, configure the PLC to read the 4-20mA signal correctly. This involves setting the appropriate input range in the PLC software to match the sensor’s output range. Ensuring this configuration is accurate is vital for precise data readings.
After making the connections, power up the system and check the readings. If everything is connected and configured correctly, the PLC should display the sensor’s data accurately. This data is now ready for further processing or monitoring.
Remember, working with 4-20mA sensors and PLCs requires attention to detail and precision. Ensuring secure connections and correct configurations not only guarantees accurate data but also enhances the reliability of your industrial automation systems. Follow these steps carefully to ensure a seamless integration of your sensor and PLC.
Calibration and Testing
Calibration and testing of 4-20mA sensors are crucial for ensuring accurate and reliable readings in industrial automation systems. To begin with, isolate the sensor from the process and connect it to a precise calibration source. This step is essential to eliminate any interference from the actual process conditions.
Start by applying a low-end calibration signal, typically 4mA. Adjust the sensor’s zero settings until the Programmable Logic Controller (PLC) reads the expected value. Next, apply a high-end signal, usually 20mA, and adjust the span settings accordingly. This calibration ensures that the sensor’s output accurately corresponds to the entire range of the process variable.
Testing follows calibration. Simulate actual process conditions and monitor the sensor’s output on the PLC. This step verifies that the sensor operates correctly across its full range. Regular calibration and testing are especially vital in critical applications where precision is paramount.
By maintaining well-calibrated sensors, you ensure that your automation system operates smoothly and efficiently, providing precise control over industrial processes. This practice not only enhances accuracy and reliability but also extends the lifespan of your sensors and overall system. Regularly scheduled calibration and testing are best practices that every industrial engineer should follow to maintain optimal system performance.
Troubleshooting Connection Issues
When troubleshooting a 4-20mA sensor connection to a PLC, start by checking the wiring. Ensure all connections are tight and correct. A loose or reversed wire can cause incorrect readings or no signal at all. Use a multimeter to verify the sensor’s output current. If the sensor outputs the correct current, the issue may lie with the PLC or its configuration.
Review the PLC’s analog input settings. Ensure the input range matches the 4-20mA signal. Check for any software errors or misconfigurations. Look at the PLC’s configuration and ensure it’s set to read a 4-20mA signal, not another type of signal. Misconfigurations can often cause signal errors or no signal detection.
If these steps don’t resolve the issue, consult the sensor’s and PLC’s manuals for troubleshooting tips specific to your equipment. These manuals can provide insights into model-specific issues that might be overlooked. Keeping these steps in mind can quickly resolve most issues, minimizing downtime and maintaining process efficiency.
By systematically addressing wiring, sensor output, and PLC settings, you can efficiently troubleshoot and resolve 4-20mA sensor connection issues, ensuring reliable operation in your industrial processes.
Conclusion
Connecting 4-20mA sensors to a PLC is a critical task in industrial automation. By understanding the importance of 4-20mA signals, following proper connection steps, and ensuring accurate calibration, you can achieve reliable and precise data acquisition. Troubleshooting any issues promptly ensures minimal disruption and maintains process efficiency. Adopting these practices not only enhances system performance but also ensures the long-term reliability of your automation infrastructure. This knowledge empowers new engineers to confidently handle 4-20mA sensors, contributing to the smooth operation of industrial processes.