Key Takeaway
To check if a relay is working, you can use a multimeter set to either continuity or resistance mode. Here’s a simple step-by-step process:
Check the Coil: Position the multimeter probes on the relay’s coil terminals. A resistance reading indicates the coil is intact. If there’s no resistance, the coil might be damaged.
Test Normally Open (NO) Contacts: Move the probes to the NO and common terminals. The multimeter should show no continuity when the relay is inactive. If there is continuity, the contacts may be stuck.
Activate the Relay: Apply voltage to the coil and check again. This time, the NO contacts should show continuity, indicating the relay is closing properly when activated.
This method confirms whether the relay’s coil and contacts are functioning as expected.
Tools Needed for Testing Relays
Before you start testing a relay, gather the necessary tools. The most important tool is a multimeter, which can measure voltage, resistance, and continuity. Additionally, you might need a power supply to activate the relay, test leads, and a basic understanding of electrical safety. Having these tools at hand will make the testing process straightforward and efficient. A good multimeter can be your best friend in diagnosing relay issues. It’s important to ensure your tools are in good working condition to get accurate results. Proper preparation saves time and ensures you don’t miss any critical steps.
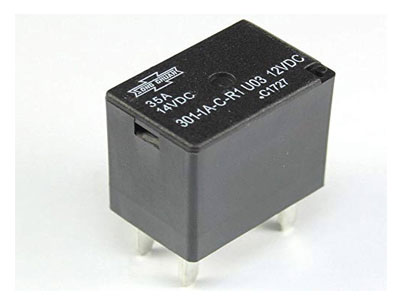
Visual Inspection of Relays
The first step in testing a relay is a visual inspection. This initial examination can reveal a lot about the relay’s condition without any tools. Look for any obvious signs of damage, such as burn marks, melted plastic, or corrosion. These signs often indicate that the relay has experienced electrical overload or environmental stress. For instance, burn marks suggest overheating, while corrosion can result from exposure to moisture.
Next, check the relay’s housing and pins for physical integrity. The housing should be intact, and the pins should be straight and free from any rust or wear. If you notice any deformities or discoloration, it’s a clear sign that the relay might be faulty. Sometimes, the issues can be resolved by cleaning or securing loose connections, making visual inspection a crucial initial step.
Performing a visual inspection is quick and can prevent unnecessary further testing if the relay is visibly damaged. It’s like giving the relay a health check-up before delving deeper. This step can save time and resources by identifying obvious faults right away. Plus, it’s a simple process that anyone can perform with a keen eye and a little attention to detail.
By mastering the visual inspection process, you, as a newly joined engineer, can develop a keen sense for spotting potential relay issues early. This fundamental skill not only helps in maintaining the reliability of your systems but also builds your confidence in handling more complex troubleshooting tasks down the line. Regular visual inspections are an essential part of maintaining the health and efficiency of electrical components.
You May Like to Read
Checking Coil Resistance with a Multimeter
The next step in relay testing is checking the coil resistance using a multimeter. Start by setting your multimeter to the ohms (Ω) setting, as this mode is specifically designed for measuring resistance. Connect the multimeter’s test leads to the coil terminals of the relay. This is where precision and care are crucial. A typical relay coil will have a specific resistance value that you can find in the relay’s datasheet.
Accurate measurement of coil resistance is essential for the relay’s proper functioning. If your multimeter shows an open circuit (infinite resistance), it means there is a break in the coil, rendering the relay non-functional. On the other hand, if it shows a short circuit (zero resistance), it indicates that the coil is shorted and unable to perform its function. Both conditions signify that the relay is damaged and needs replacement.
Ensure your readings match the expected values to confirm the relay’s integrity. This step might sound technical, but it’s straightforward once you get the hang of it. Remember, precise measurements ensure that the relay will operate correctly within the system. Always cross-reference your readings with the datasheet to avoid any errors.
By mastering the skill of checking coil resistance, you, as a newly joined engineer, can diagnose one of the most critical aspects of relay functionality. This knowledge not only helps in immediate troubleshooting but also builds a foundation for understanding more complex electrical diagnostics. Regular practice and attention to detail in this process will enhance your ability to maintain and ensure the reliability of electrical systems, making you a valuable asset to your team.
Testing Relay Contacts for Continuity
Testing the relay contacts for continuity is another crucial step in ensuring the relay is functioning correctly. Start by de-energizing the relay, which means there should be no power supplied to it. Using a multimeter set to the continuity mode, connect the test leads to the relay’s normally closed (NC) and normally open (NO) contacts. In its default state, the NC contacts should show continuity, indicating a closed circuit, while the NO contacts should not, indicating an open circuit.
Next, energize the relay by applying the appropriate voltage to the coil. This step activates the relay, switching the internal contacts. Now, test the NO contacts again with the multimeter. This time, the NO contacts should show continuity, confirming that the relay has switched from its default state to the active state. The NC contacts, conversely, should now show no continuity, indicating an open circuit.
This process verifies that the relay’s internal mechanism is working as intended, ensuring it can switch states reliably under load conditions. Accurate testing of relay contacts for continuity is vital as it confirms the relay’s ability to control circuits effectively. If the relay fails to switch correctly, it could lead to malfunctioning circuits or even equipment damage.
Mastering this testing technique allows you, as a newly joined engineer, to confidently verify the operational status of relays in various applications. It’s a straightforward yet essential skill that ensures reliable circuit operation and enhances your troubleshooting capabilities. Regular testing and familiarization with relay behavior under different states will build your expertise and ensure the longevity and reliability of the systems you manage.
Common Signs of Relay Failure
Understanding common signs of relay failure can help in early detection and maintenance, ensuring the longevity and reliability of electrical systems. One of the first signs to look for is inconsistent operation. If a relay works intermittently or fails to activate consistently, it might be on the verge of failure. Unusual noises, such as clicking or buzzing, are also indicators. These sounds can signal that the relay’s internal mechanism is struggling or malfunctioning.
Visible signs of wear or damage, like burn marks, corrosion, or melted components, are clear indicators that the relay has experienced electrical stress or environmental damage. In automotive applications, failing relays can cause significant issues. For example, flickering headlights or a car engine that won’t start are often linked to faulty relays. Recognizing these signs early can prevent more severe problems down the line.
Regular testing and monitoring are crucial. If you notice any of these symptoms, it’s best to test the relay promptly to avoid further damage to the electrical system. Early detection saves time and prevents costly repairs. Being proactive in identifying and addressing relay issues is essential for maintaining the efficiency and safety of your electrical systems.
By being vigilant and aware of these common signs, you, as a newly joined engineer, can enhance your troubleshooting skills and contribute to the smooth operation of the systems you manage. This knowledge is not only practical but also crucial for preventing potential failures and ensuring the longevity of electrical components. Regular maintenance and timely intervention are key to keeping everything running smoothly.
Conclusion
Ensuring the functionality of relays through proper testing is vital for the reliability of electrical systems. By using the right tools, performing visual inspections, checking coil resistance, testing contact continuity, and being aware of common failure signs, you can maintain optimal performance. Regular testing and maintenance help in identifying issues before they escalate, ensuring the safety and efficiency of your operations. As a newly joined engineer, mastering these testing techniques will enhance your troubleshooting skills and contribute to your professional growth. Reliable relays mean reliable systems, and your expertise ensures just that.